Showing posts with label lifestyle. Show all posts

Tuesday, 22 December 2015

12 days of Christmas: Day 2, The Christmas Bake

Love Christmas but not a fan of the Christmas pud? No problem. These no-bake Oreo cake pops are just the thing you need to tingle those taste-buds! Because Christmas is a time where we all have the lowest bank balance, with just two ingredients, these scrummy cake pops won't break the bank either. AND because Christmas is also a busy time for all of us, these cake pops are one of my quickest 'bakes' yet - ruling out the chill time, they take less than 30 minutes.

ALTERNATIVES:

If you don't have the cake pop moulds, sticks, or holders, don't worry, you can leave them as they are for the perfect Christmas party finger food. There are other alternatives for this recipe too - I usually make them with cream cheese but as these were for dessert for my boyfriend and I - and as Adam doesn't like cheese (who doesn't like cheese?) - I substituted the cream cheese with double cream. Another alternative is that I separated the Oreo biscuit from the cream in an attempt to make it a little less messy - it's not totally necessary if you don't have the time. Finally - you can put the Oreos in a food processor or blender - but for me 'it was my moms in the eighties' and the noise it makes terrifies me.

Here are the photos from this weeks bake:


Separate the cookies from the cream (optional)

Bash the cookies into crumbs

Add the crumbs to the Oreo cream before adding the double cream or cream cheese

 Mix into a paste

WARNING: It gets MESSY


Tah-dah!


RECIPE:
Ingredients:

24 Oreos 
100ml of double cream (or about half a pack of cream cheese)

Icing sugar

Water

Method:

1. Separate the Oreo biscuit from the cream. Place the biscuit in a strong clear bag - like a freezer bag - and seal (or in the blender). Put the cream into a mixing bowl for later.
2. Using something solid - I used a rolling pin - bash the biscuits up into fine crumbs (or blend into fine crumbs).
3. Pour the crumbs into the mixing bowl with the Oreo cream and add the double cream or cream cheese.
4. Roll the mixture into small balls and place in the fridge to chill - if your balls are too big they will fall off the cake pop!. They should chill for a minimum of two hours but probably best to do this overnight.
5. Once they have cooled, use the icing to replicate a Christmas pudding - for the holly leaves I cheated and used Regal Icing - you can make your own or similar to my blood-filled Halloween cakes - use an inedible decoration.


Monday, 21 December 2015

12 days of Christmas: Day 1, The Pintertest

WHY DID I THINK THIS WAS A GOOD IDEA? I am currently covered in hot wax... and so is my phone... and my jeans... and my carpet (sorry mum!) Why? Because I decided to 'customise' a candle - something that I'd seen on Pinterest.

After deciding to blog '12 days of Christmas' and seeing a number of DIY Christmas Crafts pinned all over the internet, I thought I would try one for myself and share my (non-existent) success. The first craft I clicked on - a snowman 'countdown to Christmas' decoration was apparently NOT A CRAFT but thrown in the crafts section to advertise someone's Etsy page (rolling eyes emoji). Moving on, the second craft I thought I'd try my hand at was a rustic-looking hanging Christmas-tree decoration and it was beauuuutiful. "How pretty is this Christmas tree?" It said in the description. "Very" I said to my iPad as I began to sing "oh Christmas tree, oh Christmas tree..." receiving bemused looks from my dog. "Get the instructions here" *clicks* WHAT? The instructions to make this lovely lovely decoration were GERMAN. Although I studied a little German at school, my proficiency is somewhat elementary - definitely not good enough to follow a set of instructions. Disappointed and ready to give up, I trudged on with the thought "third time lucky" running circles round my head...


Indeed, the third click was a lucky one and I found a set of instructions to create a 'personalised' candle - something I had a lot of! The post originated from hometalk.com and my final craft was promised to look something like this:


how to add images to candles, christmas decorations, crafts, seasonal holiday decor

I think you already know it didn't quite turn out as planned...

The instructions seemed pretty easy:

You first have to print your pattern onto some tissue paper (I chose a Christmas tree - in loving memory of click number two). To do this you need to Sellotape the tissue paper to a sheet of regular paper to carry it through the printer... so far so good!


Once it has printed you cut out your pattern and position it onto the candle. Then over the top of the tissue paper, wrap some greaseproof paper round the candle before heating. Still so far so good!


I chose to heat mine with a hair-dryer and put it on the highest heat... It burnt my fingers, ouch ouch ouch! So I put it on my knee - protected by a pair of jeans - and held the paper in place between my legs. Before long the wax started to melt... and it got EVERYWHERE. Persevering, despite the state of my room, I continued to burn myself (and the image onto the candle). 

The final outcome looked like this: 


basically it looked like a picture that a child has Pritt-Stick-ed onto the candle...

If I wasn't so frustrated I would have maybe attempted to heat it further - I also think it would look better on a candle that is pure white but I'm going to rule today's Pintertest as a FAIL.

Think you could do better? Try it for yourself:

http://www.hometalk.com/5992638/how-to-add-images-to-candles?utm_source=editor&utm_source=editor&utm_medium=pinterest&utm_medium=pinterest&utm_campaign=featured&utm_campaign=featured&crlt.pid=camp.wxR0oW6UvNOp

Hoping tomorrow's blog is one of success - a Christmas bake!

Ciao for now xo

Saturday, 31 October 2015

Halloween Bake on a Budget: Blood-filled Cupcakes

Having a Halloween party tonight? Don't worry, there's still a little time for a last minute bake! Taking inspiration from Tanya Burr's chocolate cupcakes (https://www.youtube.com/watch?v=49WvunWX7mc) I decided to try my very own blood-filled bake and have written it down which will hopefully make it easy for you to follow. Having done pretty bank-breaking-bakes previously, I tried to make this as cheap as possible and have also added a few 'cheats' for a quicker process and less washing up...smiles all round! Disclaimer: The spider is not edible. 

Here are the photos from this weeks bake:


 The finished product! The spiders are from Hobby Craft and are £1 for 50.

 CHEAT! for less washing up, use an apple corer for your 'blood'.

 Oops... Maybe there was more washing up than I first thought!


Ingredients:

Cakes:
225 g butter (softened)
225 g brown caster sugar
225 g plain flour
4 eggs
2 caps vanilla extract
2 tbsp milk

Filling:

12 tsp Raspberry Jam

Icing:

200 g butter (softened)
400 g icing sugar
2 caps marshmallow flavouring
1 pea sized scoop of orange food colouring

Method: 
Cakes:

1. Preheat the oven to 190 C (170 C fan oven). Place cupcake cases into tin.
2. Stir together the butter and sugar to create a soft mixture. Add the flour and the eggs.
3. Mix in the vanilla extract and milk and stir out any lumps leftover.
4. Place in the oven and bake for 20 minutes.
5. Leave to cool for about an hour.
6. (This is the cheaty bit) Following the pictures above, take an apple corer and 'de-core' your cake - be careful not to hit the bottom or the blood will fall out the other end! Spoon some blood (raspberry jam) into the hole and place the top back on to hide the spook-tacular surprise! Alternatively, if you don't have an apple corer, place the jam in a piping bag and pipe the jam inside the cakes.

Icing: 
1. Place the butter in a bowl and stir until smooth. 
2. Sift the icing sugar into the bowl and mix together. If you're adapting the recipe in any way, make sure you always have twice as much icing sugar than butter - this will keep the shape when it comes to piping!
3. Add the food colouring and stir until evenly covered and a smooth texture.
3. Pipe on your icing in a circular motion and top with spooky decoration!

Trying this recipe yourself? Don't forget to tag me in your photos! Happy Halloween.


Friday, 4 September 2015

8 Benefits of a Long Distance Relationship

After spending weeks - sometimes months at a time moping around feeling sorry for myself because my boyfriend lives 132 miles away and I can't spend every moment with him, I decided last week that enough is enough. We actually have it better than a lot of long-distance couples: at least we're in the same country! Being happy for the things I have, rather than uber mardy for the things I don't, I have taken it upon myself to write a list of benefits to cheer up both myself and any readers in the same boat as me by reminding ourselves that it's not that pants.

1. There is ALWAYS something to look forward to. 

Working in retail, I have recently seen customers get excitable over Christmas and parents telling their children 'put it on your Christmas list for Santa' - we even had our Christmas card and wrap items delivered earlier this week! Of course, Christmas is exciting but it's August - by the time Christmas gets here you will all be very very bored. Not me. Every day I see Adam feels like 1,000,000,000 christmasses in one day. I always have something to count down to and get excited about... other than Christmas.

2. Travelling. 

This doesn't mean travelling the world. In my circumstance, it means travelling 132 miles. Nevertheless, it means there are new sights to see and at 'just' 132 miles apart, new foods to try and different activities. Adam probably thinks Henderson's Relish is really gross and I'd probably want to whack that big stick thing over his head after going 'punting' in Cambridge but they're both something that without each other, we would never experience.

3. More time for 'me time' - guilt free!

As much as I love to spend time with my boyfriend, time alone is also fabulous. With Adam being so far away it means I can have girly nights in and paint my nails and pamper myself and watch Frozen without anyone telling me to shut up for singing 'For the First Time in Forever' at the top of my voice for the next few days.

4. 'Absence makes the heart grow fonder'.

The realest thing anyone ever said. Our relationship remains in the 'honeymoon period' thanks to the distance - do you think I'd be writing this post outside the honeymoon period? Probably not.

5. There is less pressure to constantly look after yourself.

This can be a good thing or a bad thing. On one hand I eat so much junk food because I'm comfort eating when he's so far away and 'Adam won't see if I get fat'... on the other hand if I don't see him every day, I don't have to shave my legs every day either! 

6. There are no awkward moments with the in-laws.

If you don't see your partner very often, you don't see their parents very often either - which is 100% a good thing even if they like you (unless they're reading this in which case it totally sucks!)

7. You treasure every moment.

Not seeing your partner so much makes you appreciate it so much more when you do. I know I went off on a tangent about Christmas earlier and silly people getting excited because X Factor is back on and that means it's Christmas - but even the little things like shopping are so much more exciting when Adam is carrying my purchases.

8. The sex.

I'm sorry to be so crude (and right now praying that his parents will never see this) but even those who aren't in a long-distance relationship know the sex is better when you go a while without it. Although it's frustrating, the distance between you keeps that lustful spark you had on the first date with late night skype sessions and suggestive text messages to keep things interesting  - about half an hour ago Adam texted to ask 'what's the new blog post about?' - I told him 'something pants' - to which he replied  'your pants or mine?' I won't tell you how the conversation continued...


I once attended a wedding where the best man's speech included some advice for us all: 'treat every night as though it's your first and every day as though it is your last'. I'm proud to say that despite the distance, me and Adam do just that. My darling, I love you beyond the stars xxxx

Saturday, 29 August 2015

Blueberry and Lemon Cheese-less Cheesecake

Whilst looking for vegan recipes on Pinterest last week, I came across a blueberry and lemon cheesecake on call-me-cupcake.blogpsot.co.uk. However, after using around £22 worth of coconut oil alone last week in my Peta Great Vegan Bake Off entry (see blog archives) I thought it was probably best for both my weighing scales AND my bank account if I just took the post as pinspiration (see what I did there?) and improvised a non-vegan option. Having never made cheesecake before and with no internet access while walking round my local Tesco, I decided to 'wing it' with the ingredients... only to come home and discover cheesecakes contain ACTUAL cheese (who knew?) which obviously leads to the 'cheese-less' part of this week's bake.


As you can probably tell, I don't make a lot of 'no-bake' bakes, this is just my second- after my own take on my mum's 'special' tiffin - which I'm sure you will see in a future post. Although the no-bake experience began with a cheese-less disaster, I will 100% be making more of these in the future because they're SO quick to make - and if it wasn't for the mess I created bashing up the biscuits, (above) this recipe also creates very little washing up - BONUS! Does Blueberry and Lemon cheesecake sound like your thing? Try it for yourself and tag me in your photos!


Ingredients:

250g digestive biscuits
100ml butter
375ml condensed milk
350ml double cream
250g blueberries
2 lemons

Method:

1. Place the biscuits in a bag and crush them into fine crumbs.
2. Melt the butter and add the biscuits, mix together.
3. Press the biscuit mixture into the tin and place in the ridge to set.
4. Whisk together the condensed milk and double cream, adding the blueberries a handful at a time. Grate and juice the lemon and add the rind and juice to the cream mixture.
5. Pour the mixture onto the biscuit base and spread evenly. 
6. Place in the fridge for 2/3 hours to set. Eat up!


For extra baking photos and videos add me on snapchat: oh_annah.


Thursday, 27 August 2015

Help! It's the Twenty-First Century

Confession Time: one thing most people don't know about me is that I am pretty old-school when it comes to technology - I don't even know how to work the family TV!

At 20 years of age, I have a DVD collection of over 150 and am probably the only person you know who doesn't have a Netflix subscription. No, I am not a techno-phobe, but what happens when you're old and grey and you can't keep up with the latest Apple innovation? Or you lose your marbles and can't remember your password? Coming from a very close-knit family, I feel it's extremely important to have something tactile to tell your story or to show your grand-kids when the time comes. Technology has advanced so rapidly recently that many children grow up with a kindle as opposed to an actual book (yes,those things still exist!) and they have 'photos' saved on their phone rather than a genuine photograph you can hold in your hand. This leads to companies like Max Spielman struggling to make a profit which increases the price of having these genuine photographs developed... it is now £8 for less than 30 photos! As a student, and a self-confessed hauler when it comes to photographs, I can't really afford the cost to have my photos developed any more so what do I do?


I recently came across an app (yes, I have an iPhone) that makes life so much easier for the haulers like me: 'Free Prints'. Free Prints allows you to submit photos from your apple device to be printed AND sent to you for a delivery cost of a mere £1.49. What's the catch? You can 'only' print 500 photos a year... that is pretty tricky even for me. The app also allows you to easily crop photos to a size that suits you and alerts you if your photo has been cropped to an extent which might affect the quality of the photographs... You can even upload old photos from your Instagram page (with a filter that makes you look even more fabulous).


Make the memories last forever and get your marbles developed before you lose them. You no longer have the excuse for cost: make sure you have something to show the grand-kids! (...and something to burn when you break-up with your ex lol)


Ciao for now xo

P.S. Sorry Max Spielman


Saturday, 22 August 2015

PETA: The Great Vegan Bake Off - Chocolate Chip Coconut Cookie Jars

Peta are running the Great Vegan Bake Off for the third consecutive year and after succeeding in making my own recipe for Orange and Cranberry crinkle cookies (see this month's posts) I decided to try it again to demonstrate my support for the radical animal rights charity! 

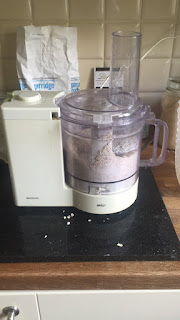
As an avid chocolate lover, plain chocolate was the first thing I could think of when pondering vegan foods and after finding Lindt Coconut Excellence on the chocolate aisle, I decided to base my recipe around the little bar of lusciousness. To further emphasise the coconut flavour, I added coconut oil as a substitute for butter - I even made my own flour by putting oats in a food processor my parents received for their wedding 25 years ago (can you believe it still works???)


I chose to make the cookie jars individually as in a rush of excitement I bought (non-oven-proof) glass jars... oops! So to check that the glass wouldn't explode in the heat, I made them one by one. If you want to try them for yourself, the recipe below provides ingredients per jar so if you want to make one for an evening snack you can... or if you want to make 50 for a party you can just multipy the measurements by 50.


Ingredients (to make one jar):

1 tsp. baking powder
3 tbsp. caster sugar
45g ground almonds
85g oats
2 tbsp. coconut oil
40g lindt excellence dark chocolate coconut squares

Method:

1. Mix together the baking powder, caster sugar and ground almonds.

2. Weigh the oats and pour them into a food processor to grind into a flour consistency and add it to the mixture.


3. Stir in the coconut oil to make into a sticky dough and add the chocolate.


4. Put the mixture into oven-proof jars or make into teaspoon size cookies (optional).


5. Bake in the oven at 160 C for 20 minutes. Eat up!


Thursday, 20 August 2015

9 Benefits of Going on Holiday with your Family

Think you're too old for a summer break with your parents? WRONG. Of course, it's fun to go on holiday with friends and lovers too, but sometimes going with family can be just as fabulous - Here are 9 reasons why:

1. At the risk of sounding like a spoilt brat... they pay.


2. You've pooped in the same bathroom like a MILLION times before - embarrassment averted!


3. If seeing each other 24/7 isn't great for your relationship - you already know before you board the plane (headphones? check!)


4. Quality time. If you're a student like me, you've spent the year away studying. A holiday together gives plenty of time for that well-needed catch up about that holiday you had with your friends 3 months ago.


5. Seeing your parents drunk is HILARIOUS.


6. Selfies like this.


7. THE FOOD! With parents paying, there is no doubt you will dine like royalty for the duration of the trip.


8. It's a lot less socially demanding... if you're just not in the mood that night, your family don't care.


9. And if you do go out, you don't have to worry about who is best-dressed/who looks best in a selfie (despite number 6 you take a LOT less selfies).


Saturday, 1 August 2015

Orange & Cranberry Crinkle Cookies

'Lemon Crinkle Cookies' aren't really my thing but when I came across a recipe for them on cookingclassy.com they sounded too delicious to ignore... so I switched a few of the ingredients and made my own version - Orange and Cranberry Crinkle Cookies.


Aside from the obvious changes to the recipe (lemon = orange and cranberry) I also switched from granulated sugar to brown caster sugar. This is mainly down to personal preference - but I'm going on holiday in 3 days and will be wearing a bikini most of the time so brown sugar > white sugar (every little helps).

This was the first time I have ever used 'cups' as a form of measurement - it didn't go as badly as I first imagined... but a little bit of the ingredients were lost each time you transferred containers and I used the same 'cup' each time so I had to clean it each time I added something - it was a lot of faffing basically! For this reason, I think I'll stick to more precise measurements and a weighing scale in the future - or maybe purchase some proper weighing cups so I don't have to keep washing up? Mason Cash have some really cute ones, hmm...

Here are a few snaps from this week's bake - add me on snapchat to see more baking blunders: oh_annah.

I made sure I took a photo before they went into the oven because my 'cookies' always turn into 'cookie pie'. 

As well as turning into a cookie pie... this time the 'pie' also went a little crispy round the edges -  so I attempted to save the soft centre while still making them look pretty with a heart shaped cutter.


Ta-dah! Despite the many dramas, while baking, these cookies made the whole house smell like Christmas (the cranberries were coated in cinnamon). 


Give them a try for yourself... do you know how to keep your cookies 'cookies' and not 'cookie pie'?  I have translated the measurements from cups to grams to hopefully make it easier for you to follow.

Ingredients:
160 g plain flour
2 tsp baking powder
1/2 tsp salt
150 g unsalted butter
250 g caster sugar
5 tsp orange extract
2 eggs
1/2 vanilla extract
10 g cranberries (approximate)


Method:
1. Preheat the oven to 180 C (160 C fan oven) and lightly coat your pan with low-fat butter

2. Separating the 'wet' and 'dry' ingredients: in one bowl mix together the plain flour, baking powder and salt. In a separate bowl mix together the butter, sugar and orange extract until the mixture becomes pale and smooth.

3. To avoid curdling - add one egg to the 'wet' ingredients, and one to the 'dry' ingredients before stirring the two mixtures together. Add the cranberries.

4. Using a teaspoon, scoop the mixture onto the baking tray to make little cookie dough balls. Bake at 180 C for 20 minutes until golden. Eat up!

Thursday, 23 July 2015

Easy as 1, 2, 3 Lemon and Honey Face Mask


The weekend is almost here... and what better time to revive your skin than after a long week at work?

With a mini weekend break coming up myself, I want to look and feel as good as possible - which can be a little difficult after a few early shifts at work! A pamper night was a must... but half-way through the night I discovered I had used all my face masks (whoops). Not wanting to interrupt relaxation time with a trip to the store - and with a tight budget - I thought I might as well have a go at making one from scratch.

I took a risk and decided to improvise and make my own recipe. To keep things simple, I selected just 3 ingredients: honey, lemon and sugar. As well as relieving the symptoms of a bad cold, honey and lemon also make a fabulous skin soothing combo: they're both proven to clear acne - and lemon also has a tonne of vitamins which illuminate the skin and even reduce the appearance of scars. The sugar, on the other hand, is purely for exfoliation purposes - coffee grains are also really good for this, but I didn't think the smell would blend so well with the honey and lemon.

Admittedly it wasn't as good as a good shop-bought face mask - it was a little runny and expectedly sticky - but the recipe is so simple and after the face mask, my skin felt a lot smoother and it genuinely left me feeling a lot more lively than my 5.30 am start would imply.


Try the face mask for yourself and let me know what you think.

Ingredients:
 (relaxed measurements)
1 tbsp Honey
1 tsp Lemon
1 tsp Sugar
2 slices cucumber

Method:
1. Pour the honey in a small container and heat until luke-warm
2. Add the lemon and sugar
3. Apply a generous layer to your skin
4. Cover each eye with a slice of cucumber for extra revitalisation (and a tasty post-pamper snack!)


Sunday, 19 July 2015

LUSH HAUL!

When I say 'haul' I mean 'not really a haul at all... haul'. I am poor. Yes, I still attempt to 'haul' with a £1,500 student overdraft to pay off.


My first 'haul' post HAD to be Lush. I just love the smell when you walk in and the friendly staff and (almost) everything is pink and glittery and rainbows and unicorns and if you've ever had a lush bath you'll know exactly what I mean when I say you come out feeling like an utter goddess! ...Not to mention the fabulous brand ethics too. As lush are retiring a few of these products at the end of the summer (boohoo) I dashed to say a final goodbye to some of my faves. 


Sex Bomb - The first product is a regular in my bath basket... the Sex Bomb. They're not actually retiring this one but I bought it anyway because I couldn't resist. It smells so florally and turns your bath a magenta-y pink and even the petals dissolve on this one which makes cleaning the bath afterwards so much easier!


Blackberry Bath Bomb - The next is the Blackberry Bath Bomb. This one looks sort of boring because its just a generic bath bomb shape but it actually has a little surprise in the middle! It smells citrusy, which I love and turns your bath an unusual violety colour which you don't get from a lot of lush products.


Fizzbanger - Third on the list is the Fizzbanger... which they are not retiring- thank goodness -  because I think it might be my new fave. I always put off buying yellow/orangey colours when it comes to lush and other bath products because I think it makes your bath look like you've done a little wee... but I was pleasantly surprised to see it actually turns your bath GREEN (silly me!). My boyfriend pushed me to get this one after a lot of umming and arring - we both love the smell which is really lemony and citrusy again - notice the theme? It is made with popping candy which crackles in your bath and also has a little surprise inside, just like the Blackberry Bath Bomb. Definitely on the favourites list.


Rose Jam Bubbleroon - Up next is the Rose Jam Bubbleroon. I haven't actually tried this one before but I always buy the same bubble bars so this time I decided to go for something different. It smells light and floral-y and I'm hoping it will turn my bath pink but you never know! Due to the design, they split quite easily compared to the other bubble bars which I think is fabulous... but my boyfriend thought they were stuck together and pulled one apart which made me laugh - and then we had to walk away before anyone noticed what he'd done, oops.


Dorothy - Now its time for the ones that are being retired (so sad:(). This one is a bubble bar called Dorothy. My bestie, who works at lush has been recommending this to me for a long time now and I've always shrugged it off with a 'yeah yeah' and religiously stuck to my usual bubble bars. Now its leaving I wish I had tried it sooner. It smells floral-y and turns your bath a pale blue. 


Granny Takes a Dip - This is the hardest goodbye for me. Granny Takes a Dip bath bomb and the final bath product of my Lush 'haul'. When a kind lady first sold this to me about a year ago when it first launched, she told me it smelt like m&ms. I wasn't quite sure what she meant because to me, Lush just sold citrusy, florally smelly things - but when I first used it I knew exactly what she meant! This bath bomb is the epitome of Lush... it swirls as it dissolves, looking like a rainbow in your bath or 'My Little Pony' hair, taking me back to my childhood. I'm so sad to see this one go... but SO excited for the new Granny Takes a Dip bubble bar to be launched nationwide.


Vanilla Dee-Lite - The final product in my Lush 'haul' and another fave that's being retired is the Vanilla Dee-Lite body lotion. I love the smell of vanilla which is what initially drew me to this product. Sometimes though, I find the vanilla-y scent can be quite overbearing when it comes to bathing products, but this one is mildly floral-y too which I really love! Despite what it looks like on the outside, when you squeeze it out it is actually a really pale pink-y colour. The texture is quite light too which I look for in a moisturiser as my skin is really sensitive and thick products can bring out a rash. Another sad farewell.


I hope you enjoyed my Lush 'haul'. What are your Lush faves? What should I try next? Let me know in the comment box below!


Tuesday, 14 July 2015

'Skinny' Cookies & Cream Brownies


'Skinny' isn't something you often see in the same phrase as 'brownies'  - so when I came across this recipe on Pinterest - I had to put them to the pintertest. A lot of the ingredients are 'reduced fat' or 'non-fat' which is what makes them so low in calories - personally, I stuck strictly to the recipe, with a beach holiday on the horizon - but for a cheaper and 'fatter' option you can also go for full fat alternatives!

Although I'm not completely convinced at the 'skinny' claim, I was genuinely surprised with how well these mini treats turned out. Usually my baking tastes pretty gurrrd (if I do say so myself!) but it comes out the oven looking like a tiny monster has stomped all over it. My mum was the first to comment on the better presentation of my cookies & cream brownies, noting the shiny glaze on top. Seeing as this recipe has just 1/4 of the sugar I usually use, I think the glaze is from the natural yoghurt -  I'm not quite sure - but I'll be sure to incorporate more yoghurt into my baking in the future for sparkly treats all round!


Give these brownies a try yourself and tag me in your photos. Let me know what you think.

To make 15 scrumptious brownies you will need:


90g plain flour

60g cocoa powder
1/4 tsp baking powder
1/4 tsp salt
28g unsalted butter (melted)
2 large eggs
1 tsp vanilla extract
96g granulated sugar
60g non-fat greek yoghurt
90ml non-fat milk
9 reduced-fat oreos

Method:


1. Preheat the oven to 160 C (140 C fan oven) and lightly coat your pan with non-stick cooking spray or low-fat butter


2. Separating the 'wet' and dry ingredients: whisk together the flour, cocoa powder, baking powder and salt in a small bowl. In a separate bowl, whisk together butter, eggs and vanilla. Stir in the sugar before adding the greek yoghurt and milk. Stir until smooth. Add the dry mixture and stir before folding in two thirds of the crumbled oreos.


3. Spread the batter into the pan and gently press the remaining oreo pieces into the top. Bake at 160 C for 15-20 minutes. Carefully cut your brownies into squares and leave them to cool on a cooling rack. Eat up!


Monday, 6 July 2015

10 Things University Taught Me


1. Tap water in the UK can still give you chronic diarrhoea (I feel you Charlotte York)

2. Raw chicken is more lethal than a great white shark 

3. People really don't care what your curry smells like

4. You can be £1,000 overdrawn and still be more financially stable than 75% of campus

5. Budgeting is the most pointless thing you will ever do

6. Its okay to have pizza for breakfast, lunch AND dinner... all on the same day

7. Paperchase is practically heaven on Earth

8. 90% of the things you see on the Pinterest 'crafts' tab are not as cheap as they seem

9. Nobody gives a damn what you wear... if you want to wear last nights outfit to your lectures then GURRRRL you go right ahead. At least you turned up

10. In the end: life takes you to unexpected places, love brings you home