Saturday 29 August 2015

Blueberry and Lemon Cheese-less Cheesecake

Whilst looking for vegan recipes on Pinterest last week, I came across a blueberry and lemon cheesecake on call-me-cupcake.blogpsot.co.uk. However, after using around £22 worth of coconut oil alone last week in my Peta Great Vegan Bake Off entry (see blog archives) I thought it was probably best for both my weighing scales AND my bank account if I just took the post as pinspiration (see what I did there?) and improvised a non-vegan option. Having never made cheesecake before and with no internet access while walking round my local Tesco, I decided to 'wing it' with the ingredients... only to come home and discover cheesecakes contain ACTUAL cheese (who knew?) which obviously leads to the 'cheese-less' part of this week's bake.


As you can probably tell, I don't make a lot of 'no-bake' bakes, this is just my second- after my own take on my mum's 'special' tiffin - which I'm sure you will see in a future post. Although the no-bake experience began with a cheese-less disaster, I will 100% be making more of these in the future because they're SO quick to make - and if it wasn't for the mess I created bashing up the biscuits, (above) this recipe also creates very little washing up - BONUS! Does Blueberry and Lemon cheesecake sound like your thing? Try it for yourself and tag me in your photos!


Ingredients:

250g digestive biscuits
100ml butter
375ml condensed milk
350ml double cream
250g blueberries
2 lemons

Method:

1. Place the biscuits in a bag and crush them into fine crumbs.
2. Melt the butter and add the biscuits, mix together.
3. Press the biscuit mixture into the tin and place in the ridge to set.
4. Whisk together the condensed milk and double cream, adding the blueberries a handful at a time. Grate and juice the lemon and add the rind and juice to the cream mixture.
5. Pour the mixture onto the biscuit base and spread evenly. 
6. Place in the fridge for 2/3 hours to set. Eat up!


For extra baking photos and videos add me on snapchat: oh_annah.


Thursday 27 August 2015

Help! It's the Twenty-First Century

Confession Time: one thing most people don't know about me is that I am pretty old-school when it comes to technology - I don't even know how to work the family TV!

At 20 years of age, I have a DVD collection of over 150 and am probably the only person you know who doesn't have a Netflix subscription. No, I am not a techno-phobe, but what happens when you're old and grey and you can't keep up with the latest Apple innovation? Or you lose your marbles and can't remember your password? Coming from a very close-knit family, I feel it's extremely important to have something tactile to tell your story or to show your grand-kids when the time comes. Technology has advanced so rapidly recently that many children grow up with a kindle as opposed to an actual book (yes,those things still exist!) and they have 'photos' saved on their phone rather than a genuine photograph you can hold in your hand. This leads to companies like Max Spielman struggling to make a profit which increases the price of having these genuine photographs developed... it is now £8 for less than 30 photos! As a student, and a self-confessed hauler when it comes to photographs, I can't really afford the cost to have my photos developed any more so what do I do?


I recently came across an app (yes, I have an iPhone) that makes life so much easier for the haulers like me: 'Free Prints'. Free Prints allows you to submit photos from your apple device to be printed AND sent to you for a delivery cost of a mere £1.49. What's the catch? You can 'only' print 500 photos a year... that is pretty tricky even for me. The app also allows you to easily crop photos to a size that suits you and alerts you if your photo has been cropped to an extent which might affect the quality of the photographs... You can even upload old photos from your Instagram page (with a filter that makes you look even more fabulous).


Make the memories last forever and get your marbles developed before you lose them. You no longer have the excuse for cost: make sure you have something to show the grand-kids! (...and something to burn when you break-up with your ex lol)


Ciao for now xo

P.S. Sorry Max Spielman


Saturday 22 August 2015

PETA: The Great Vegan Bake Off - Chocolate Chip Coconut Cookie Jars

Peta are running the Great Vegan Bake Off for the third consecutive year and after succeeding in making my own recipe for Orange and Cranberry crinkle cookies (see this month's posts) I decided to try it again to demonstrate my support for the radical animal rights charity! 

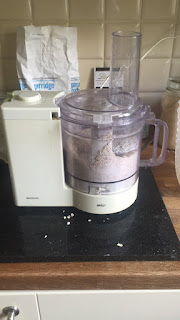
As an avid chocolate lover, plain chocolate was the first thing I could think of when pondering vegan foods and after finding Lindt Coconut Excellence on the chocolate aisle, I decided to base my recipe around the little bar of lusciousness. To further emphasise the coconut flavour, I added coconut oil as a substitute for butter - I even made my own flour by putting oats in a food processor my parents received for their wedding 25 years ago (can you believe it still works???)


I chose to make the cookie jars individually as in a rush of excitement I bought (non-oven-proof) glass jars... oops! So to check that the glass wouldn't explode in the heat, I made them one by one. If you want to try them for yourself, the recipe below provides ingredients per jar so if you want to make one for an evening snack you can... or if you want to make 50 for a party you can just multipy the measurements by 50.


Ingredients (to make one jar):

1 tsp. baking powder
3 tbsp. caster sugar
45g ground almonds
85g oats
2 tbsp. coconut oil
40g lindt excellence dark chocolate coconut squares

Method:

1. Mix together the baking powder, caster sugar and ground almonds.

2. Weigh the oats and pour them into a food processor to grind into a flour consistency and add it to the mixture.


3. Stir in the coconut oil to make into a sticky dough and add the chocolate.


4. Put the mixture into oven-proof jars or make into teaspoon size cookies (optional).


5. Bake in the oven at 160 C for 20 minutes. Eat up!


Thursday 20 August 2015

9 Benefits of Going on Holiday with your Family

Think you're too old for a summer break with your parents? WRONG. Of course, it's fun to go on holiday with friends and lovers too, but sometimes going with family can be just as fabulous - Here are 9 reasons why:

1. At the risk of sounding like a spoilt brat... they pay.


2. You've pooped in the same bathroom like a MILLION times before - embarrassment averted!


3. If seeing each other 24/7 isn't great for your relationship - you already know before you board the plane (headphones? check!)


4. Quality time. If you're a student like me, you've spent the year away studying. A holiday together gives plenty of time for that well-needed catch up about that holiday you had with your friends 3 months ago.


5. Seeing your parents drunk is HILARIOUS.


6. Selfies like this.


7. THE FOOD! With parents paying, there is no doubt you will dine like royalty for the duration of the trip.


8. It's a lot less socially demanding... if you're just not in the mood that night, your family don't care.


9. And if you do go out, you don't have to worry about who is best-dressed/who looks best in a selfie (despite number 6 you take a LOT less selfies).


Saturday 1 August 2015

Orange & Cranberry Crinkle Cookies

'Lemon Crinkle Cookies' aren't really my thing but when I came across a recipe for them on cookingclassy.com they sounded too delicious to ignore... so I switched a few of the ingredients and made my own version - Orange and Cranberry Crinkle Cookies.


Aside from the obvious changes to the recipe (lemon = orange and cranberry) I also switched from granulated sugar to brown caster sugar. This is mainly down to personal preference - but I'm going on holiday in 3 days and will be wearing a bikini most of the time so brown sugar > white sugar (every little helps).

This was the first time I have ever used 'cups' as a form of measurement - it didn't go as badly as I first imagined... but a little bit of the ingredients were lost each time you transferred containers and I used the same 'cup' each time so I had to clean it each time I added something - it was a lot of faffing basically! For this reason, I think I'll stick to more precise measurements and a weighing scale in the future - or maybe purchase some proper weighing cups so I don't have to keep washing up? Mason Cash have some really cute ones, hmm...

Here are a few snaps from this week's bake - add me on snapchat to see more baking blunders: oh_annah.

I made sure I took a photo before they went into the oven because my 'cookies' always turn into 'cookie pie'. 

As well as turning into a cookie pie... this time the 'pie' also went a little crispy round the edges -  so I attempted to save the soft centre while still making them look pretty with a heart shaped cutter.


Ta-dah! Despite the many dramas, while baking, these cookies made the whole house smell like Christmas (the cranberries were coated in cinnamon). 


Give them a try for yourself... do you know how to keep your cookies 'cookies' and not 'cookie pie'?  I have translated the measurements from cups to grams to hopefully make it easier for you to follow.

Ingredients:
160 g plain flour
2 tsp baking powder
1/2 tsp salt
150 g unsalted butter
250 g caster sugar
5 tsp orange extract
2 eggs
1/2 vanilla extract
10 g cranberries (approximate)


Method:
1. Preheat the oven to 180 C (160 C fan oven) and lightly coat your pan with low-fat butter

2. Separating the 'wet' and 'dry' ingredients: in one bowl mix together the plain flour, baking powder and salt. In a separate bowl mix together the butter, sugar and orange extract until the mixture becomes pale and smooth.

3. To avoid curdling - add one egg to the 'wet' ingredients, and one to the 'dry' ingredients before stirring the two mixtures together. Add the cranberries.

4. Using a teaspoon, scoop the mixture onto the baking tray to make little cookie dough balls. Bake at 180 C for 20 minutes until golden. Eat up!